Saturday, February 17, 2018

Saying "Thank You:" Volunteer Recognition Gifts

So, every year I have to come up with a cheap, creative recognition gift for my volunteers. I usually have around 30, so it needs to be cost effective. Depending on what I come up with, it may be a project I have the children in RE create... but it's gotta be pretty darn cool to be a gift.

Here's a short list of projects I have made over the years. Maybe you'll find one that works for your organization...

Seashell Candles


Two candles in seashells, one is lit in focus in the foreground and one is not lit and out of focus in the background.
The warm glow of thanks.
A photo demonstrating the technique for pouring the hot wax out of the cup into the sea shell.
Steady... steady!
This takes a bit of pre-planning, but it's quick to execute. Not for kids to get their craft on with since you are dealing with hot wax. You can buy shells, or get the ideal size for "free" with your dinner. In my household, we enjoy those frozen stuffed scallop and clam shells from the grocery for quick meals (and they're cheap... something like 2 for $5). After the meal, I'll throw them into the dishwasher to clean off the residue, and add them to a bag. For later.  :)

Then, about a year later (see what I meant about pre-planning?) I place some tea lights (use the ones in the little aluminum cups) onto a cookie sheet and place in an oven at 200°F/95°C for approximately 30 minutes to melt. Once they are all melted, I remove the wick and place it in the center of each shell. Then I pour the wax into the shell. I use hemostats to hold onto the cup to pour, but needle nose would also work.

Alternately, if you have tea lights that are not in a cup, you can just place them (centered) directly into the sea shell and place the shell in the oven for same temp and time. Then you don't have to mess with pouring!
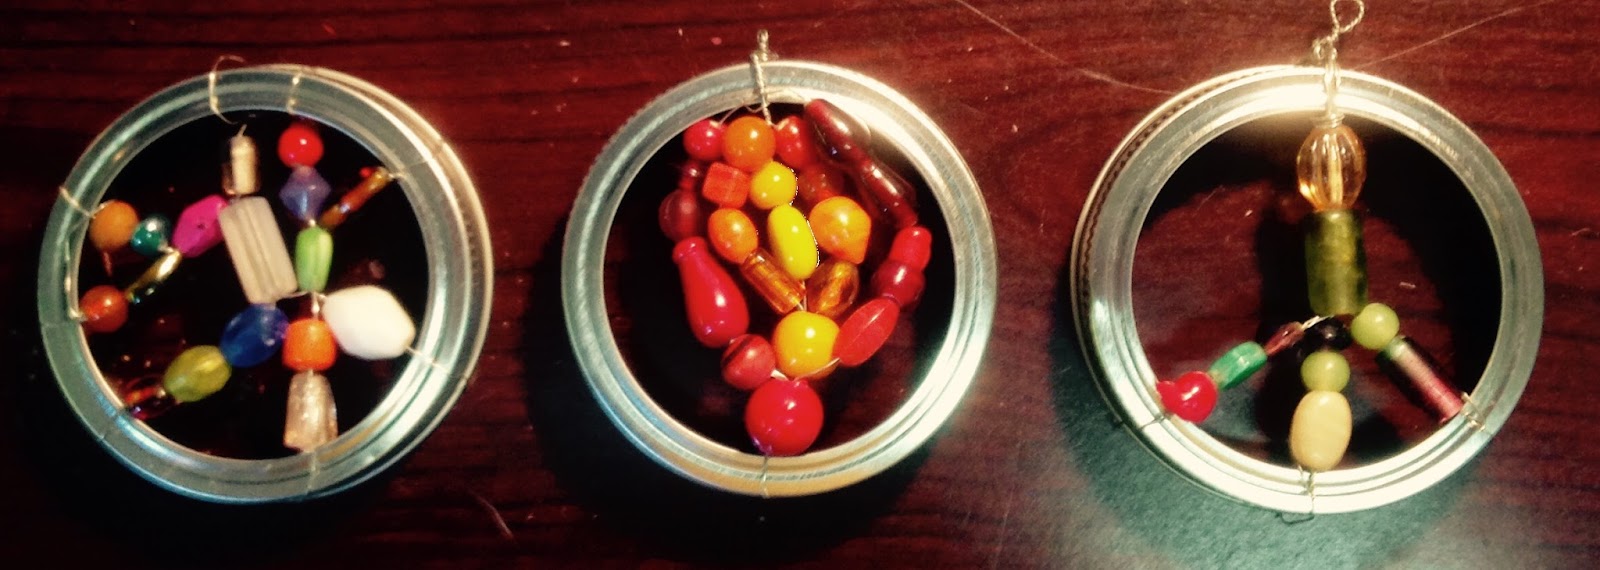
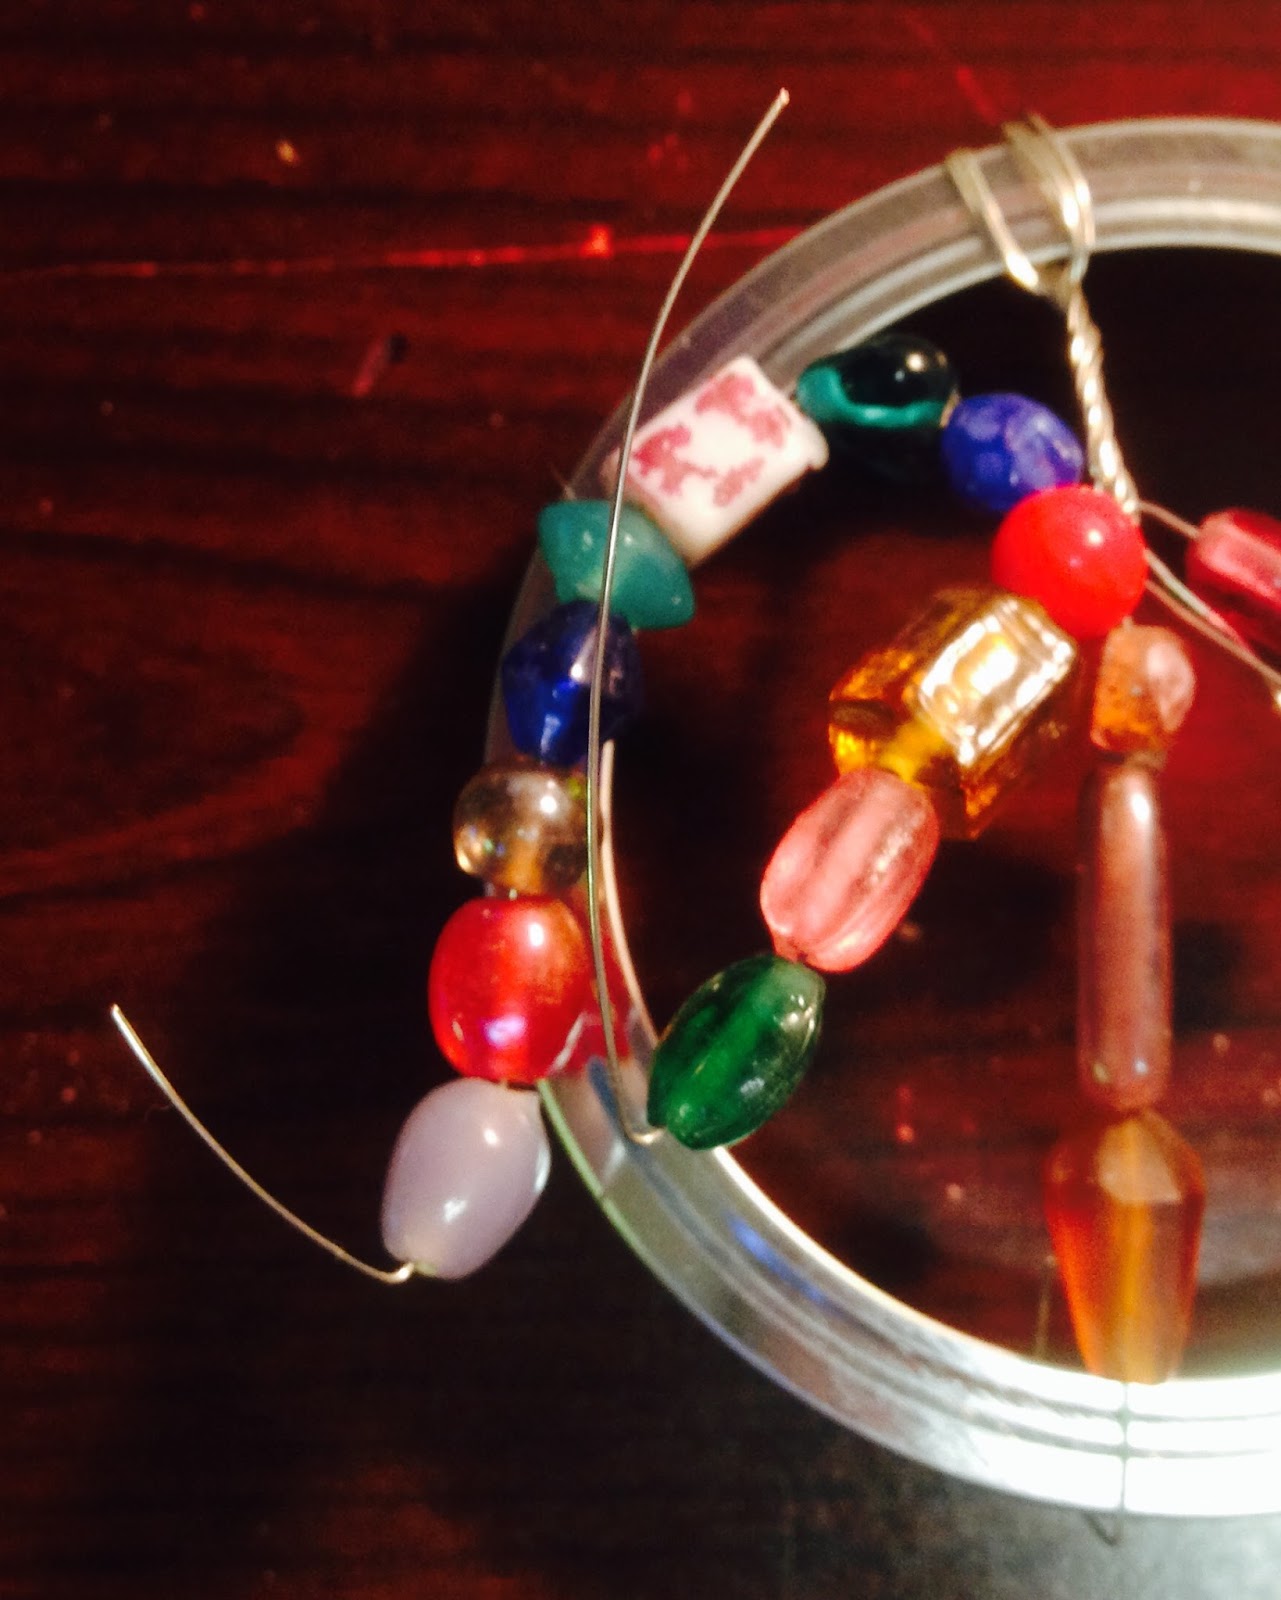
Beaded Suncatchers

I already posted this in another post, so I'll just link to that gift!


Let's Make Zither/Lap Harp Music Together!

For those of you with young musicians in your midst, you may have a zither (also known as a lap harp). Popular with the Montessori crowd, this is a great way to introduce young kids to music, and to give them the feeling of success early on.

Unfortunately, there are not many free music resources available. Many of the units have the same dimensions so I have created a handful of free resources for my fellow instructors. All of these need to print out on legal sized paper. I know this will work with the Music Maker. I hope they work with yours.... what's nice is if it needs to be cut a little differently to fit in yours, you should be able to modify it!

Blank Zither Sheet Music
A blank sheet for your zither for you to create or transcribe your own music.

Some hymns from the Unitarian Universalist hymn book that might work for this:
  • Morning Has Broken  (#38)
  • We Sing Now Together (#67)
  • I've Got Peace Like A River (#100)
  • Amazing Grace (#205/206)
We've Got The Whole World In Our Hands (based on this Tapestry of Faith lesson)

     We've got the whole world in our hands.
     We've got the whole world in our hands.
     We've got the whole world in our hands.
     We've got the whole world in our hands.
     We've got the rivers and the oceans, in our hands (repeat 3x)
     We've got the trees and the flowers, in our hands (repeat 3x)
     We've got the air we breathe, in our hands (repeat 3x)
     We've got the whales and the dolphins, in our hands (repeat 3x)

Thursday, January 28, 2016

How to Make a Lot of Winter Hats. Fast.

We have a project once a month where we do a multigenerational project with a service learning component for about 2 hours. It’s tough to find something that works in all those. With the Syrian refugee crisis, we wanted to do something that would have an impact locally for those rehomed refugees in our community. This is also a great project for homeless populations (or for a Secret Kindness Agents project).
I developed this pattern after looking at several different patterns online and trying them out. I took the best of them and created this Service Learning Project for our congregation. It takes a little pre-work but not much. This is also modeled on a traditional Syrian hat so I’m trying to capture some of that “feels-like-home” feeling for these individuals. If you are doing this as part of a group project, divide the work into stations. Or split into teams and have competitions. It's fun to come up with ideas. We're going to be doing this while listing to a talk from a local refugee non-profit.
I reference figures/pictures below in my write-up. Here's a PDF with all the images and the writeup
Please: this project is intended as a charity activity. Do not use this pattern in a commercial/retail manner. Copyright 2016.


Supplies:
  • Fabric Scissors: Make sure you have sharp scissors to use. No fun getting a blister just because of dull scissors!
  • Yarn: Only need it if you plan on sewing up the top rather than tying it. Complimentary or contrasting color… up to you!
  • Needle: Only need it if you plan on sewing up the top rather than tying it. Use a chenelle or sharp tapestry needle if using yarn. Can be standard needle and thread, too.
  • Sewing machine: Optional. You can hand sew the edge if you want after cutting. But much faster with a sewing machine because you  can sew the seam on several hats at once.
  • Fleece: Most fleece comes in about a 58/60” length. Fabric needs to be cut 22”x11” (with the 22” length going with the stretch).  In the fleece that I purchased, all the stretch was from side to side (selvage to selvage) rather than along its length. Therefore, I could get about 2 across the width. Take the total number of hats you want to make, divide it by two and then multiply that by 11. That number is the number of inches of fleece you will need (assuming no waste). Use what’s left of the fleece for gloves or scarves. Or sew two colors together to get totally wacky hats! (See figure 1)

(
)

Length in inches of fleece needed =
Number of hats to make
x 11

2


Directions:
Fold the fabric from one side 11”. Cut off that the entire length and sew up that seam (or sew it and then cut it off. Whatever works for you…) (See Figure 2) If you are doing this with a large group of folks, this step can be done ahead of time... or do part of this ahead of time so those who are cutting/tying have something to get started on.
You end up with a long tube. Cut it into 11” lengths (or longer if you want a longer fringe). (See Figure 3) Along one edge of the tube, cut right next to the seam 1-2” in and remove it (See figure 4). Then cut fringes 1-2” in along the entire length. (See Figure 5)
Turn the tube inside out, so the stitched seam edges are inside. At this point you have a couple options for finishing the top:
  1. You can tie (with a double knot) each pair right across the top. This is the simplest and easiest for little kids.
  2. You can make an “X” (see figure 7 on how to determine the 4 corners).
  3. Finally, you can sew a running stitch along the top edge and pull it tight. You can use thread or yarn (more decorative).
Finishing:
Fold the bottom edge of the hat up twice, giving it a nice rolled edge. If you need to, add a stitch or two to hold it in place.


You can add some colorful pony beads to some of the fringe to make it extra special.

Tuesday, April 7, 2015

Tiger and Lame Fox

For the lame fox, I found a small plastic collie and removed ("cut off" sounds so harsh) his legs. I also added a water canteen and a small package so when the fellow decides to part with those items to let God provide for him, the storyteller can do something graphically to emphasize that part to the children. 

Felt is great, isn't it? I feel like I made Flintstones-style meat pieces...


Wednesday, March 11, 2015

Teacher Recognition - beaded suncatchers

This year, the children are making beaded suncatchers for our teachers as a "thank you" for all they do, sharing their light of knowledge with us! Ah, who am I kidding? I can't pay 'em, but they get a sweet gift every year. :)


IMG_0366.JPG


Materials List:
  • Wire (26 gauge is good, but can go thicker, too)
  • Glass beads
  • Macrame metal hoops, handmade wire hoops (5” in diameter or so), or mason jar sealing ring (used in pictures)


Instructions:
  1. IMG_0370.JPGCut wire into lengths around 14 inches long (for the mason jars, 12” is fine for macrame or wire hoops).
  2. Wrap around hoop and either twist or loop at halfway point so you have 2 strands of wire to work from. For the younger kids, keep it to 4 strands (or 2 lengths). Older kids can have 6 strands (3 lengths). If they have a design that will use an odd number, just take one of the wires and combine it with another (put two wires in each bead). Depending on the design, the kids may not want them all in one bunch like the photo, and each one will need to be added individually (i.e., random design, far left above).
  3. IMG_0371.JPGStart adding beads. As you finish a strand, you can push the wire up so the beads don’t fall off (see photo). As you add beads, make sure you aren’t adding too many by checking the length of the beads to where you want to attach your wire back to the hoop. Come up with creative ways create your decoration - combine wires randomly (like far left, above) or create a symbol (like the peace sign, far right). Other ideas: randomness, hearts, flame, tree...
  4. Once you are done, it’s time to finish it off on the hoop. Loop it around the hoop and try to get it to twist back on itself. A needle nose pliers may be very helpful here!

Thursday, February 12, 2015

Bowl of Nature Wonder

We live in Omaha, so it's not as if our children are growing up in a cement jungle, but we do introduce another way to approach nature in our Spirit Play classroom. If their homes are anything like mine, there are few opportunities to just sit down with a leaf or a stone and look at it closely. To study it. Magnify it.

That's what this bowl is all about.


I've put items in there that they may encounter often. And some they may have never encountered. Horsetail grass is a weed. If you look closely to the seed head, the "tail" has little serrated edges. They can certainly feel them. There are bones where they can see the internal structure - that they are not solid all the way through. And that "weakness" makes them stronger. Seashells whose patterns get more complex through magnification. The different parts of a feather. Geometry found in seed pods.

It's a great way for them to quietly explore the world, and share the wonder.

Altar of Exploration & Expression

This is one of the most popular items in our Spirit Play classroom. I wanted to do something like this so that kids could explore values, spiritual needs and other religions through tactile items. Children will take out the tray and start to explore the items, sometimes taking out 5-6 items to place on the altar area  that interest them. Some will talk with or ask the class adults about some of the items. What I have tried to instill in the adults is that if you don't know what something is, don't be afraid to admit it. They need to know that no one has all the answers. Old hymnals and a lovely glazed chalice with a flameless candle round out the top.


What I have is tray with several compartments - it's like a typesetter's tray. You could use a crafting bead tray or even a shallow bowl. Adults within the congregation have really enjoyed filling it up with items. I often go to put something away in here and find new additions! I have religious items from many different faiths (evil eyes, mini torah, hamsa, cross with 12 stations on back, chalices). A yo-yo. A compass. A key. A small glass jar of glitter. Items representing the 4 seasons. Items from nature and man-made. Dollhouse items are a great source of props for this, esp. for "books."

For what it's worth, the cabinet is an old TV cabinet that had a swivel top. Sometimes these odd pieces of furniture can be really useful. I never had a good place or use for it, until I found the perfect home for it in this classroom. I removed the swivel top and placed the tray on the VCR space. It's the right height for these kids. Plus, it has enclosed storage below for me to store upcoming lessons. When I need more space to store lessons or extensions, I can remove the doors and I'll have that.